Early Alert Reports
Starfish Early Alert reports allows instructors to provide feedback to students regarding their academic progress and reestablish course expectations. The goal is to alert students of habits earlier on in the semester and motivate them to take corrective action, so that it doesn't impact their success later in the course. If you have any questions, contact Starfish@utoledo.edu or 419-530-1275.
The Spring 2024 reporting windows for each part of term are listed below. When the
report officially opens, instructors will be notified via email with a direct link
to complete their reports.
Access Starfish Early Alert Report
Feburary 5 - February 18
- Full Term Courses
- Nursing Term Courses
- First Half of Term Courses
- CBE 1 Courses
March 25 - April 7
- Second Half of Term Courses
March 11 - March 24
- CBE 2 Courses
Utilize the training materials to learn more about how to access and complete Starfish Early Alert Report(s). For questions or to request one-on-one training, contact the Starfish administrator at 419.530.1275 or Starfish@utoledo.edu.
How to Submit Early Alert Reports
-
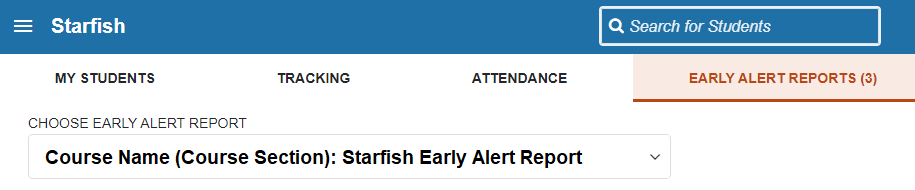
Access Starfish Report: Directly access your Starfish report(s) through the email notification sent by the system when your report opens or by clicking on the button below.
- Select Course Section: If you are teaching multiple course sections this semester, you may have multiple
reports to complete. Use the drop-down menu to select your desired course section
and to report on the students enrolled in that course section.
- Read Directions: The directions will contain any important notes to consider when completing the report.

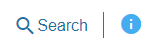
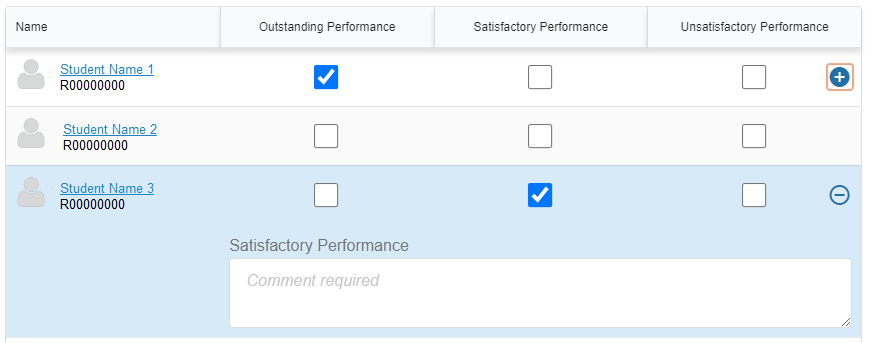
- Review the Tracking Items Available: Review the descriptions and the reason to raise a specific tracking item on a student
by clicking on the blue "i" button. Additionally, you may search for a specific student
on the report by utilizing the Search feature.
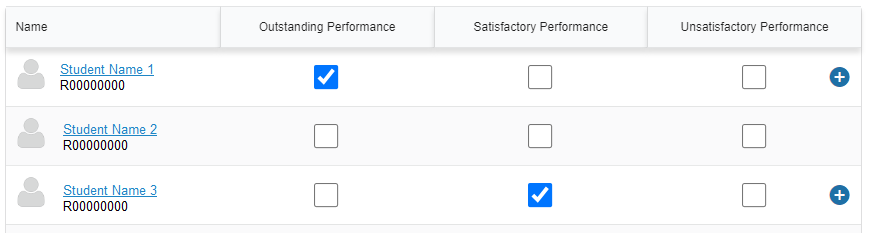
- Select Tracking Item: Use the check boxes next to each student's name to assign them the specific tracking
item. If none of the items apply to a student, do NOT select a tracking item for that
student. You may submit the report with blanks for students where applicable. Only
select one tracking item per student.
- Add Comments: Enter a comment to further explain the reason for assigning a specific tracking item
to the student. Depending on the tracking item, some comments are optional. If you
would like to add a comment on these items, click the "+" button. Comments are viewable
by students and staff, so provide descriptive, constructive, and professional feedback.
See comment examples below.

- Saving Progress: If you are connected to the internet, Starfish will automatically save your work as
you are completing the report and provide a time stamp of when your work was last
saved. However, if you do not submit your report prior to the deadline, all your work
will be lost. If you wish to erase all of your progress and start over, click the
"Reset" button.

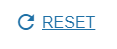
- Final Review: When you have finished providing feedback on all students, select the "Submit" button
to complete the report. Once the report is submitted, you will not be able to re-access
the report, so ensure you review every student prior to clicking submit.
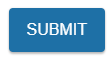
- Confirmation Message: A confirmation message will display indicating that you have successfully submitted
the report for this course section. If you have additional reports to complete for
other course sections, you will be prompted to proceed to the next report.
- Starfish Notifications: Once you submit the report, students will receive an email associated with the tracking
item you selected, and the message will include your comments. The tracking item will
be viewable on the student's Starfish folder and allow university staff to easily identify students to proactively intervene.
- Resolve Tracking Item: Once a student addresses the details of the tracking item, it is important to resolve the item in Starfish, so that it no longer appears on the student's account as active. Jump to section "How to Resolve Tracking Items".
Training Video
Review the training video for guidance on completing Starfish reports.
Various tracking items will be available to raise for each student to categorize their academic progress. Instructors will simply select the appropriate tracking item associated with the student and add comments regarding the further details. We suggest waiting to submit your report(s) until you have graded any major assignments.
Unknown Performance or Not Applicable
- No Item Selection - If none of the items apply to a student, do NOT select a tracking item for that student. You may submit the report with blanks for students where applicable.
Outstanding Performance
- Course grade of A or B.
- Performing well in course.
- Send positive feedback to students.
Satisfactory Performance
- Course grade of C.
- Meeting course expectations, but room for continued improvement.
- NOT in danger of failing currently.
Unsatisfactory Performance
- Course grade of D or F, In Danger of Failing.
- Extremely low grades to date.
- Complete lack of course engagement.
Comments are visible by students and staff to help with outreach. Students will receive an email with instructor comments, so direct the narrative to the student with constructive, & professional feedback.
Suggested Comment Structure
- State the primary reason for selecting this specific tracking item.
- Mention how this concern impacts the overall grade.
- Recommend action steps for the student to rectify the situation.
Comment Examples
Flag Comment Example
-
“I understand that low grades can be overwhelming at times. Although you did not do well on the first exam, I would like to remind you that you are capable of success in college. We have many resources at UToledo to help you along the way. I encourage you to meet with me during my office hours as soon as possible so we can discuss strategies to aid in your success in this course.”
Kudos Comment Example
- “You’re doing a great job meeting the expectations of the course, you should be proud of yourself. Keep up the fantastic work.”
After submitting the Starfish report, students will receive an email message associated with the tracking item raised on them (see below for the templates). The email message will include a general message about the tracking item, instructor comments, and suggested resources for the student to utilize.
Outstanding Performance Email Message
From: StudentSuccess@utoledo.edu
Reply-To: Kudos Creator
Subject: Excellent Work in [Course Name] ([Course Section Id])
Hello [Student First Name],
Congratulations! We are reaching out because you have been recognized by your instructor
for your academic course performance. Your dedication and determination to succeed
has not gone unnoticed. Keep up the amazing work this semester!
Course: [Course Name]
Instructor: [Raiser Name]
Instructor comments (if provided): [Raise Notes]
If you would like to contact your instructor, reply to this email in order to send
a message directly to [Raiser Name].
Best,
Student Success Team
The University of Toledo
Satisfactory Performance Email Message
From: StudentSuccess@utoledo.edu
Reply-To: Flag Raiser
Subject: Your course progress in [Course Name] ([Course Section Id])
Hello [Student First Name],
We are reaching out because your instructor shared an update about your course progress
this semester. They noted you are making satisfactory progress thus far in the class and offered some additional comments (see below).
Course: [Course Name]
Instructor: [Raiser Name]
Instructor Comments: [Raise Notes]
If you have any further questions, we encourage you to reach out to your instructor
for support. Contact your instructor directly by replying to this email to send a message to [Raiser
Name].
Additional Campus Resources
To help empower you to continue to meet your academic goals, we wanted to provide
some additional campus resources for your consideration.
- How-To Resources to help you navigate academics, technology, personal wellness, financial wellness & campus life
- Academic Advisor
- Academic Support Services (Tutoring, Writing Center, Supplemental Instruction, & TRIO)
- Student-Athlete Support Services (if an NCAA athlete)
- Office of Accessibility and Disability Resources
Best,
Student Success Team
The University of Toledo
Jump Back to Top of Section
Unsatisfactory Performance Email MEssage
From: StudentSuccess@utoledo.edu
Reply-To: Flag Raiser
Subject: High Academic Concern from your Instructor in [Course Name] ([Course Section Id])
Hello [Student First Name],
We are reaching out because your instructor is very concerned about your academic
success. It is very common for students to encounter academic challenges and to overcome
them. Our goal is to help empower you through academic challenges, and connect you
to UToledo resources to aid in your success.
Course: [Course Name]
Instructor: [Raiser Name]
Instructor Comments: [Raise Notes]
Action Steps: We encourage you to reach out to your instructor as soon as possible for guidance
and support. Contact your instructor by replying to this email in order to send a
message directly to [Raiser Name].
Additional Campus Resources
- How-To Resources to help you navigate academics, technology, personal wellness, financial wellness & campus life
- Academic Advisor
- Academic Support Services (Tutoring, Writing Center, Supplemental Instruction, & TRIO)
- Student-Athlete Support Services (if an NCAA athlete)
- Office of Accessibility and Disability Resources
Best,
Student Success Team
The University of Toledo
Jump Back to Top of Section
In Starfish, there are additional reporting items available to raise on students outside of the scheduled reporting times throughout the semester. Instructors can refer students to specific campus resources using the Referral feature.
How to Raise a Tracking Item
- Access Students: Click the Starfish menu and then click "Students".

- Select the My Students Tab: There are multiple tabs featured across the top of Starfish, so ensure you are on
the My Students tab, which will individually list each student account in alphabetical
order.

- Identify Student: Search for the student you would like to raise a tracking item (you may need to clear
any previous filters to locate the student). In order to identify a group of students
to raise a tracking item, apply filters by using either attributes, organizations,
cohorts, etc.

- Select Student(s): Once you locate the student folder, select the box next to their name. If you would
like to select multiple students, you may do so by selecting the box next to all applicable
names. Note that any action you complete on multiple students will be done on all
selected students, including the comments you add. Therefore, if you want to personalize
the comments for each student, you will need to individually select each student.

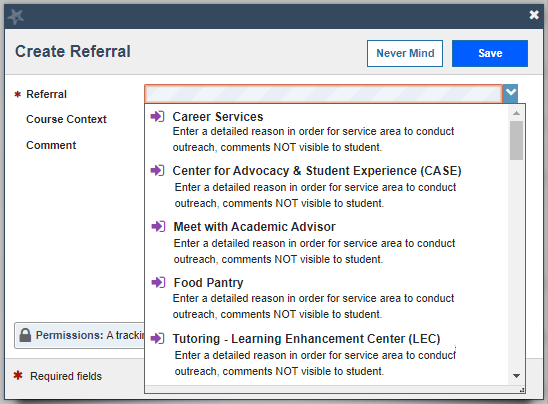
- Select the Tracking Item Type: Click the desired tracking item icon - Flag, Referral, or Kudos.

- Flags will allow you to raise concerns on the student's academic performance or update the status of student registration (Registration Codes).
- Referrals will allow you to refer a student to a campus resource (Academic Advisor, Tutoring, Food Pantry, Career Services, etc.)
- Kudos will allow you to send the student positive feedback on their academic performance.
- Select Tracking Item: In the new window, a drop-down list of tracking items should appear, so select the
desired item you would like to raise on the student. Review the descriptions under
the reporting items to see what circumstances qualify for this item to be raised on
a student.
- Select a Course (Not Required): If the tracking item is regarding a specific course, select the course option, which
will list the courses the student in currently enrolled.

- Select a Due Date (Not Required): Some of the tracking items will allow you to select a due date for the task. The
student will receive a reminder email once the due date has passed if the item has
not been addressed. Recommendation: Set the due date at least one week from the date
you raise the item to provide enough time for the student to act.

- Comment: Add a detailed comment with the reason you are raising this tracking item on the student,
so that other Starfish users or the service area can assist with outreaching to the
student. Most items will allow the student to view the comments, so make sure to provide
descriptive and constructive feedback.
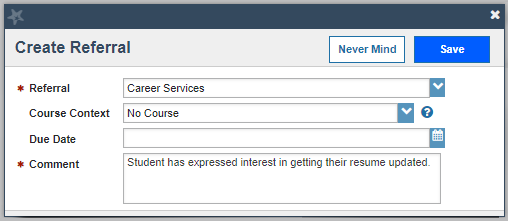
- Click Save to raise the tracking item on the student.
Available Referral Tracking Items
- Career Services
- Center for Advocacy & Student Experience (CASE)
- Counseling Center
- Counseling Center - Case Management for Community Resources
- Financial Wellness Counselor
- Food Pantry
- Meet with Academic Advisor
- Meet with Instructor
- Meet with Student-Athlete Support Services
- Office of Accessibility & Disability Resources
- Rocket Aid - Financial Emergency Intervention Program
- Rocket Solution Central
- Supplemental Instruction (SI)
- TRIO Student Support Services
- Tutoring - Learning Enhancement Center (LEC)
- Writing Center
Filter to students who have active tracking items raised by the Starfish Early Alert Report. This process will allow users to easily identify students who may need additional interventions.
STEP 1: Identify Students with Tracking Items
Starfish will display any student with an active tracking item under the Tracking
Tab. Therefore, utilize the additional filter options to filter to your specific caseload
of students (assigned advisees, specific major/minors, student-athlete assignments,
TRIO students, etc.).
How to Filter to Students with Active Tracking Items
- Access Students: Click the Starfish menu and then click "Students".
- Select the Tracking Tab: There are multiple tabs featured across the top of Starfish, so ensure you are on
the Tracking tab, which will list students with active tracking items in Starfish.

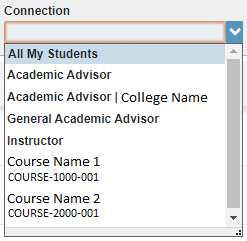
- Select your Connection: Depending on your role, you may have to select a specific connection to filter to
a specific caseload of students.
- Academic Advisors - Select "Academic Advisor" to filter students directly assigned to you on Banner. Instead, you may filter to students in a specific major/minor by using the organization filter. View directions here.
- Athletic Advisors - Select "Athletic Advisor" to filter to your assigned student athletes.
- TRIO Advisors - Select "TRIO" to filter to all TRIO students.
- CCP/TPS Advisors - Select "Academic Advisor" to filter students directly assigned to you on Banner.
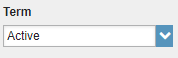
- Select Term: Select term as "Active".
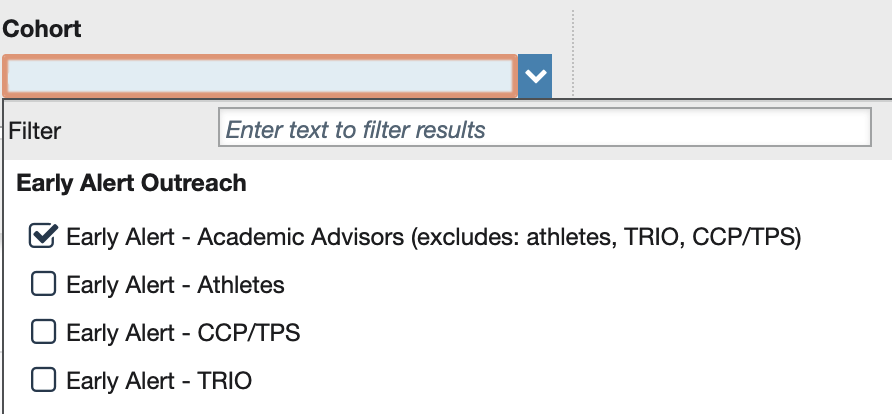
- Select Cohort: Depending on the student's affiliations (TRIO, Athlete, CCP/TPS, etc.), the student
may have multiple staff members reaching out to them. Therefore, we have created cohorts
to directly filter you to students who are connected to you alone.
- Academic Advisors - Select "Early Alert - Academic Advisors (excludes: athletes, TRIO, CCP/TPS)".
- Athletic Advisors - Select "Early Alert - Athletes".
- TRIO Advisors - Select "Early Alert - TRIO".
- CCP/TPS Advisors - Select "Early Alert - CCP/TPS".
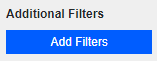
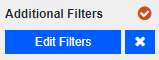
- Click Add Filters button: Access additional filtering options by clicking the Add Filters or Edit Filters button.
- Click Tracking Items: In the new window, multiple filtering options will be available on the side menu,
select Tracking Items.
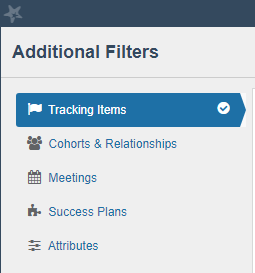
- Select Item Name: Click the drop-down "Item Name" and select the tracking items you would like to view.
For the Fall 2023 Early Alert reports, select "Unsatisfactory Performance".

- Click Submit to filter to your students with active flags.

STEP 2: Outreach to Student
Outreach directly to student to address the raised concern. Utilize the download feature
to obtain email addresses to send a blind carbon copy email to the students. Document
this outreach attempt as a comment on each of the tracking items, so others can view
the outreach attempt and avoid duplicating efforts.
How to Document Outreach Attempts
- Select Student's Tracking Item: Once you locate the student's tracking item, select the box next to their name. If
you would like to select multiple students, you may do so by selecting the box next
to all applicable names. Note that any action you complete on multiple students will
be done on all selected students, including the comments you add. Therefore, if you
want to personalize the comments to each student, you will need to individually select
each student.

- Comment Button: Click the Comment button to add a comment to the tracking item.

Alternatively, you may instead hover over the icon of the tracking item (flag icon, referral icon, star icon) to access the comment button as well.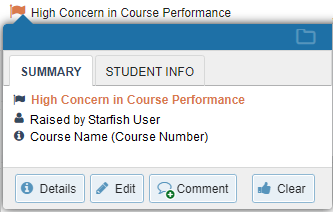
- Enter Comment Details: Document the details of your outreach regarding the tracking item (email outreach,
phone outreach, etc.) to inform others of the work already being done and to help
minimize duplicate outreach.
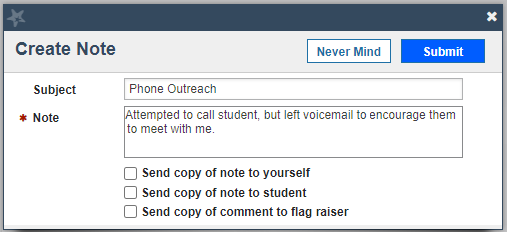
- Send Copy of Comment: There is the option for you to send a copy of the comment to yourself, the student,
or the raiser. If you were to send a copy of the comment to the student, you would
need to structure the comment in the format of an email message directed toward the
student. Enter the subject as the subject of the email message and then enter the
body of the email message in the note section. Ensure to include a greeting, your
message, and your signature. Please note that if you have selected multiple students,
do NOT personalize the message, instead keep the message generic without any personal
identifying information.
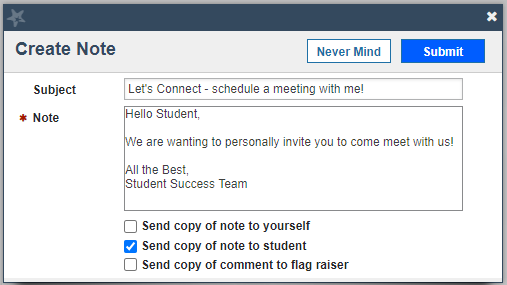
- Click Submit to save changes.
STEP 3: Resolve Tracking Item
Once a student addresses the details of the tracking item, it is important to resolve
the item in Starfish as either successfully addressed or unsuccessfully addressed.
Resolving the item will no longer show the item as active, so others do not attempt
to contact the student anymore regarding the concern.
How to Resolve Tracking Items
- Select Student's Tracking Item: Once you locate the student's tracking item, select the box next to their name. If
you would like to select multiple students, you may do so by selecting the box next
to all applicable names. Note that any action you complete on multiple students will
be done on all selected students, including the resolve reason and comments you add.
Therefore, if you want to personalize the resolve reason and comments to each student,
you will need to individually select each student.
- Resolve Button: Click the Resolve button to clear the tracking item.

Alternatively, you may instead hover over the icon of the tracking item (flag icon, referral icon, star icon) to access the clear button as well. - Select a Resolve Reason: There are various options available to categorize your reason for resolving the tracking
item, select that option here. Resolve reason examples include successfully addressed,
not successfully addressed, no longer relevant, or created by mistake.
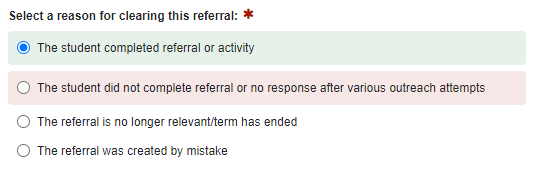
- Enter Comment Details: Add a comment regarding the further details of the reason for resolving the tracking
item.

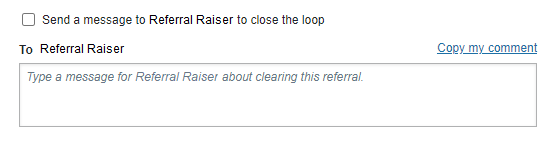
- Unselect Send Message to Raiser: There is the option for you to send an email notification to the raiser of the tracking
item, which will indicate that the tracking item they raised has been resolve. However,
due to there being so many tracking items in the system, it is recommended to unselect
this option to avoid overwhelming users with email notifications.
- Click Submit to save changes.
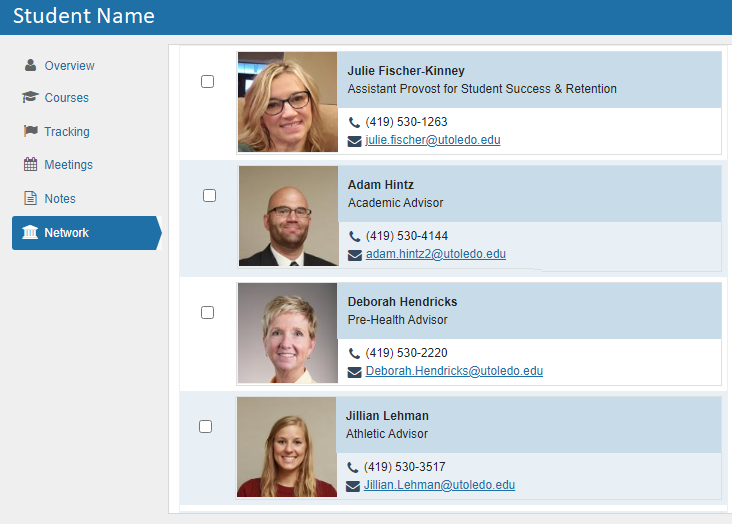
Each student has a personalized success network in Starfish, which will list the student's assigned academic advisor, athletic advisor, and more (see below for full list). Access the student's Success Network to identify who is connected to the student and obtain their contact information.
- Academic Advisor (as assigned on Banner)
- Instructors for the current semester
- Student-Athlete Support Services Coordinator
- Pre-Health Advisor
- TRIO Student Support Services Coordinator
- Assistant Provost for Student Success & Retention
How to Access Student's Network
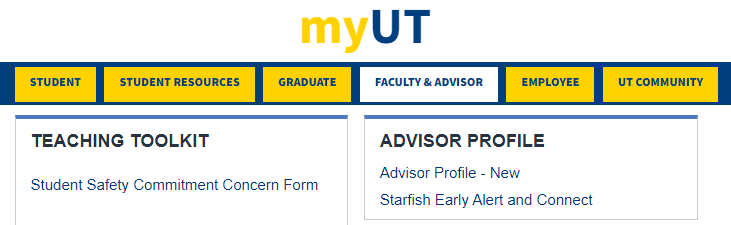
- Access Starfish: Login to the MyUT Portal. Click on the Faculty & Advisor Tab. Under the Advisor Profile section (top-right corner), click
on the link "Starfish Early Alert & Connect".
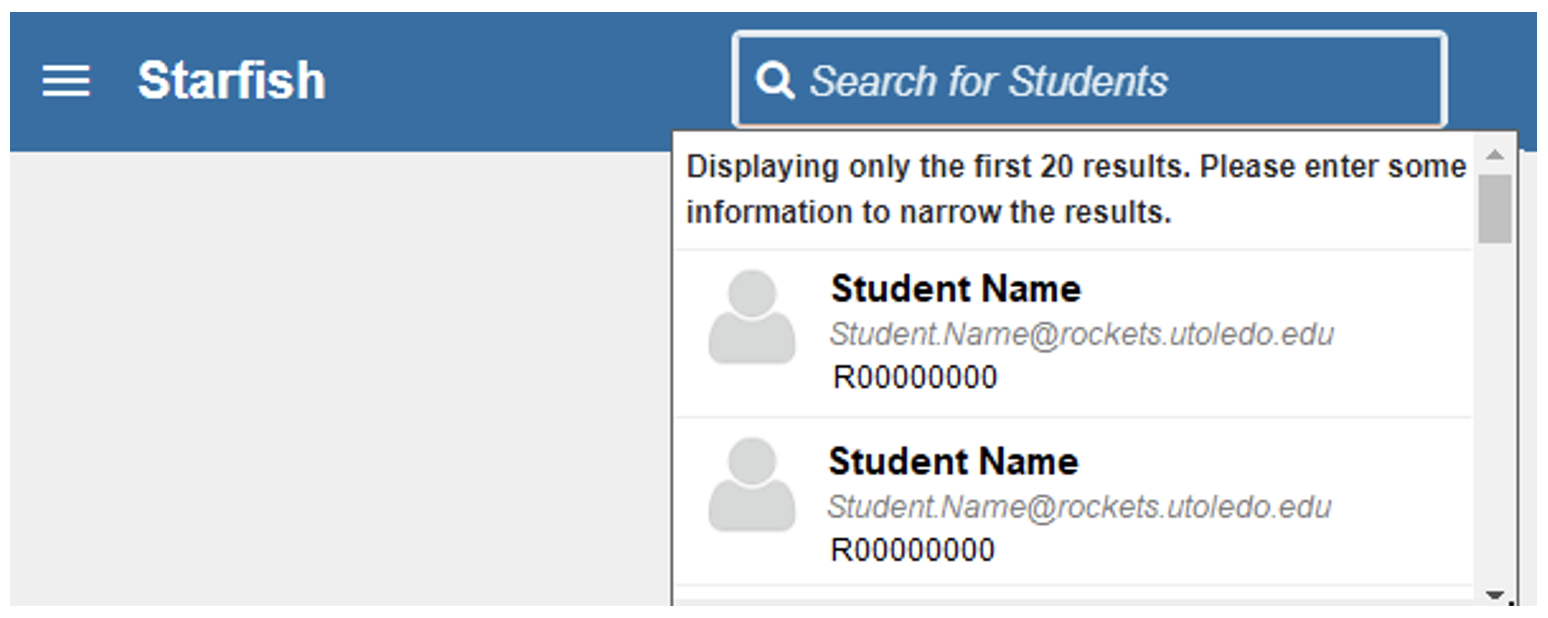
- Search for Student: Once in Starfish, use the search bar (top-right corner) to locate the student. Click
on their account to access their Starfish folder.
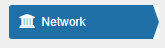
- Access Network: Once in the student folder, click on “Network” from the side menu.
- Review Success Network: The student's network will display individuals directly connected or assigned to the student.