

How to add online forms
Using webforms, we have the capability of creating online forms to appear on our website. These forms may be used for surveys, event registration, applications and more.
How to create a webform
- To begin using webforms, please register for an account here.
- Once your account has been approved, you may log in with your UTAD username and password at https://webforms.utoledo.edu/login/. Select your department from the "Department" drop down menu and click "Sign-In."
- Click the "New Form" button.
 If you're creating a new form from scratch, select "Blank Form." If you're using
an existing form that you would like to copy and edit, select "Import Form," then
"Clone an existing form" and select which form from the drop down menu. Click "Continue."
If you're creating a new form from scratch, select "Blank Form." If you're using
an existing form that you would like to copy and edit, select "Import Form," then
"Clone an existing form" and select which form from the drop down menu. Click "Continue." - Name the form by clicking "Title Me" in the upper left-hand corner and typing in the field.
- Use the tools in the left-hand menu and the controls in the top menu to build and edit the form.
- Once you add a form element it will appear to the right in the preview. Click on it
to edit it. Click on the gear icon
 for advanced editing options. Click the red "X"
  to remove it.
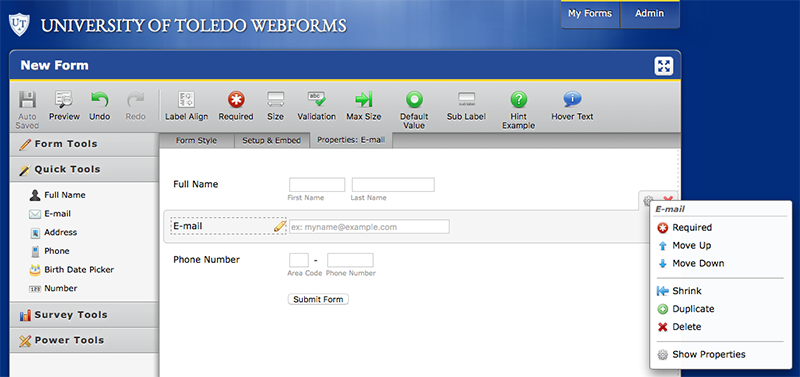
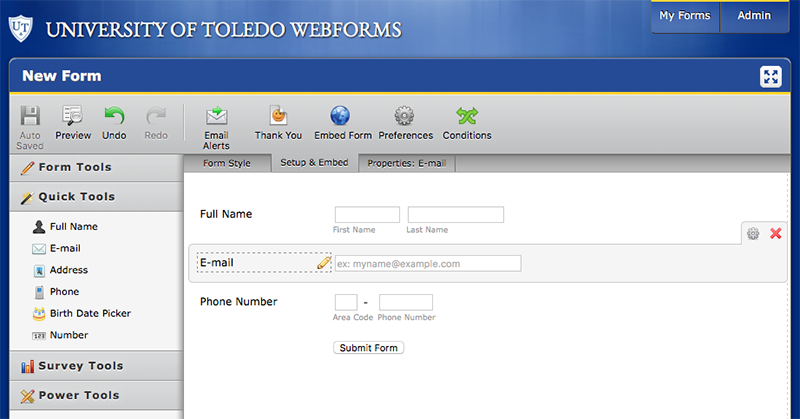
- When your form is completed, click the "Setup & Embed" tab to edit the email alerts
and thank you message.
- A thank you message automatically appears when a user submits an entry. The default
message reads, "Thank You! Your submission has been received." Edit the message or
redirect to a website by clicking on the "Thank You" button.
 Choose between the three options and click "Next" to edit the message. Click "Finish"
to save it.
Choose between the three options and click "Next" to edit the message. Click "Finish"
to save it. - An email alert is automatically sent when a user submits an entry. The default email
address to which the alert is sent is the administrator of that department's account.
To change the email address or the alert message, use the following steps:
- Click on the "Email Alerts" button.

- Click on "Notification," which is the original alert automatically created.
- To edit the email address, click on "Reply-To and Recipient Settings" in the bottom right-hand corner of the new window. In the field that says "Recipient E-mail," type the email address you prefer.
- To edit the alert message, click "Next" to view the "Compose Email" window. Use the toolbar to edit the message.
- You can send a test email to view the email alert.
- Click "Finish" to save it.
- Click on the "Email Alerts" button.
- To add an additional email alert, click "Email Alerts," then click "Add New Email," and follow the above steps.
- As you work on the webform your edits will be automatically saved. To ensure your
most recent changes have been saved, look in the upper left-hand corner for the "Auto
Saved" icon.
 If the "Save" icon
  appears instead, click it to save your work.
When the webform is complete and ready to use, you must embed the form into a web page in Omni Update. Use the following steps to embed the form.
How to embed a webform
- Open the webform you want to embed and click on the "Setup & Embed" tab.
- Click on the "Embed form" icon.

- In the new window that appears, copy the form ID presented in numbers.
- On the utoledo.edu website, browse to the section to which you want to add the form. Log in and click on "Pages" to view the list of pages and folders in that section.
- Locate the webforms folder inside your unit's folder. If you do not have a webforms folder, click on the green "+ New" button near the top and create a folder titled "webforms." Be sure to create all webforms in this folder.
- Click on the webforms folder and click the green "+ New" button.
- Select the webform page template.
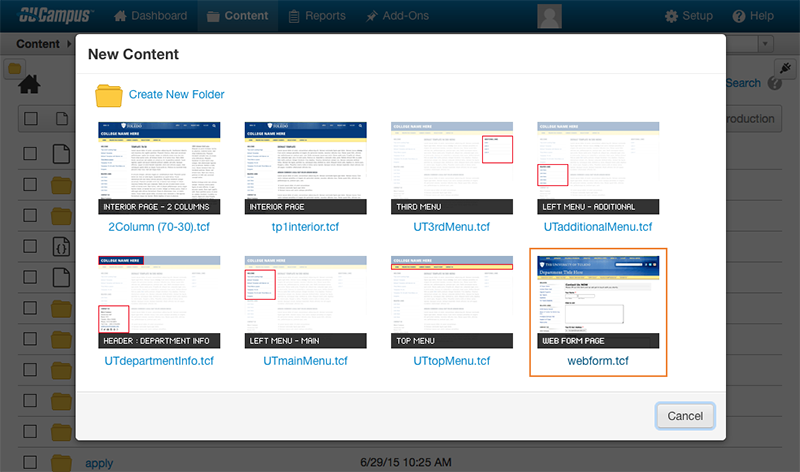
- In the new window that appears complete the form and paste the form ID into the "WebForm ID" field. For more information on how to create a new page, click here.
- Click the blue "Create" button.
- To add text above or below the form click the green "Edit" button.
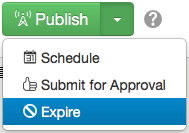
- Click the green "Publish" button to make your new online form live. If there is a
certain date when you want your form to be no longer available, you can set it to
expire using the following steps.
- Click the green "Publish" button, then in the dropdown menu, click "Expire."
- You will then see the option to "Replace" or "Recycle" the form. If you choose recycle, then the web page will be deleted from OmniUpdate, but not from the webforms manager. If you choose replace, then the user will be presented with a web page advising them that the registration period has expired.
- Enter the date and time you wish the form to be replaced or recycled. When choosing the replace option, replace the file with the "formexpiration.pcf" file found in the "webforms" folder.
- Click the blue "Schedule" button.

- Click the green "Publish" button, then in the dropdown menu, click "Expire."
Please note that any changes you make to the form after you have created the web page will automatically update the web page, so you don't have to update it in both places.