Remote Desktop Connection (RDP)
Remote Desktop Connection is an application used to remote into one of the UT computers/laptops and work from home. Make sure that the device that you would like to remote into is turned on. To accomplish this, you will need an appropriate VPN connection as well. Follow the steps to use Remote Desktop Connection:
- First, you will need the tag number of the UT device that you would like to remote into. Possible ways of locating the Tag Number / Computer Name of UT computer:
- White sticker on the physical machine with the Tag Number of the device
- Visit mycomputer.utoledo.edu
- Right click in the upper left corner of the desktop on "This PC" and choose "Properties." A window should open and the computer name is located about mid-page under the third grouping
- Right Click Start (Windows Logo in lower left corner)> Click "System" > Mid Page under "Drive specifications" and under "Device name."
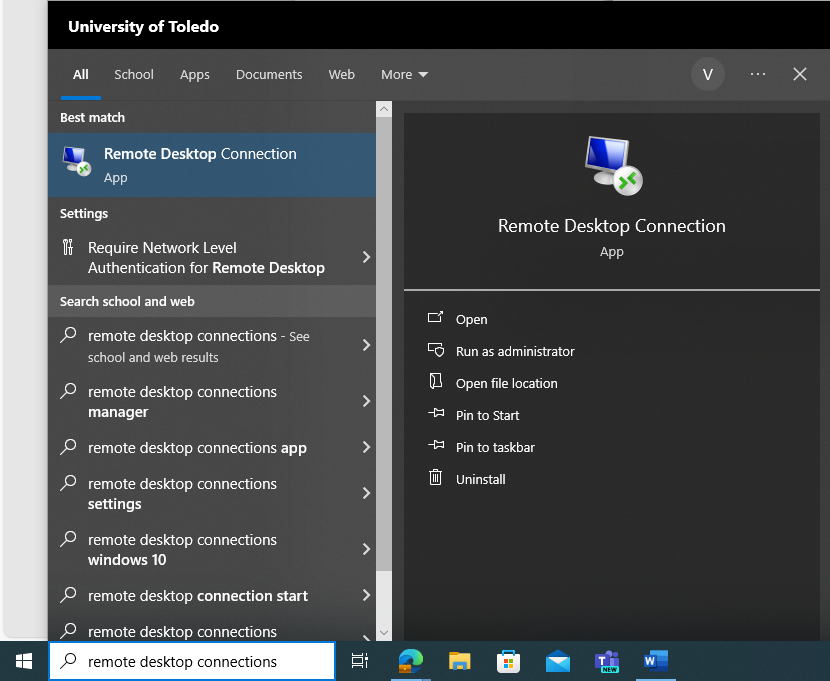
2. Open the Remote Desktop Connection on the machine that you wish to control your desktop from. You can do this by hitting the Windows key, and then type “Remote Desktop Connection.”. Hit enter after you find the application.
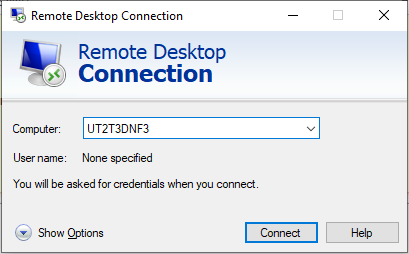
3. There should be a box popping up. There should be a field where you will be entering the tag number of the computer you would like to remote into. It should be something like this. (Note: the tag number in the photo is an example. Please enter the tag number of the computer you would like to remote into). if you wish to have the audio from the remote machine play on your local machine (such as for a WebEx conference), see the configuration in Step 9. If you wish to use your local video camera *webcam) on the remote desktop (such as to forward the video for a WebEx), see the configuration in Step 7.
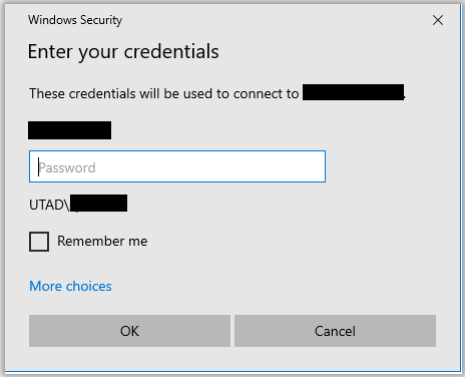
4. You might be then asked for credentials. Enter your UTAD username and UTAD password. If the username is prefilled, type in just your password.
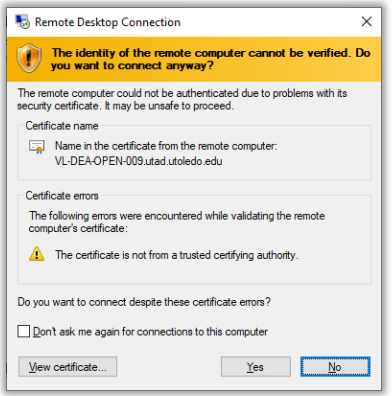
5. You may see a warning regarding the certificate on the remote machine. Click “Yes” to continue.
6. You will then be connected to the remote machine within the new window that opened. This should behave just as if you were sitting at the monitor/keyboard of this remote-controlled machine. To disconnect from the remote computer, click on the “X” in the upper right portion of this window. You should see the following dialog box. Click “OK” to disconnect.
7. Remote Audio Configuration
Click on “Show Options”
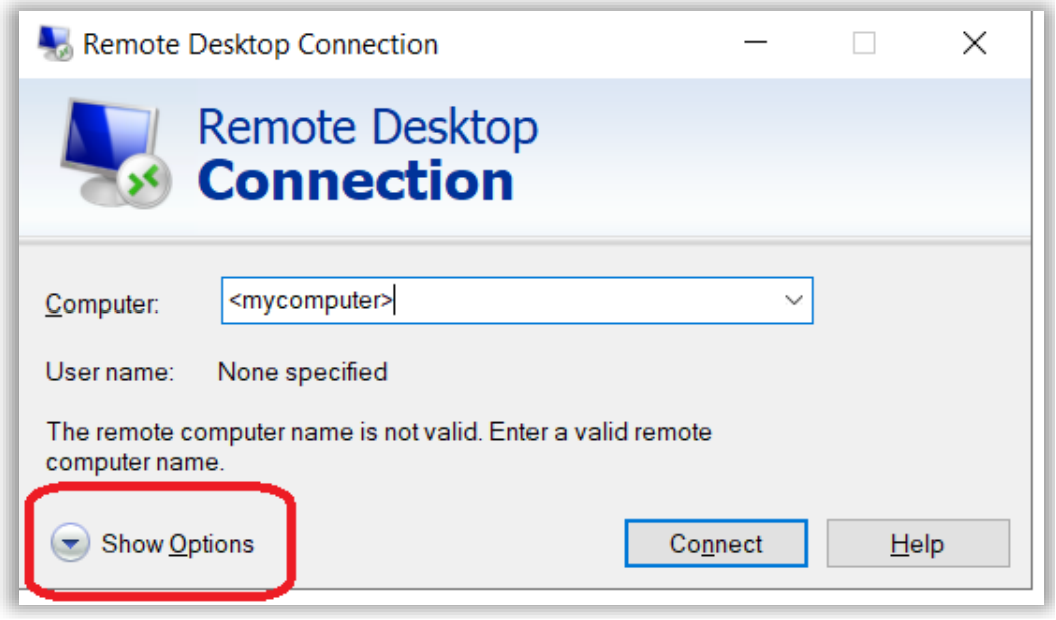
8. Go to Local Resources tab and click “Settings” under Remote Audio box.
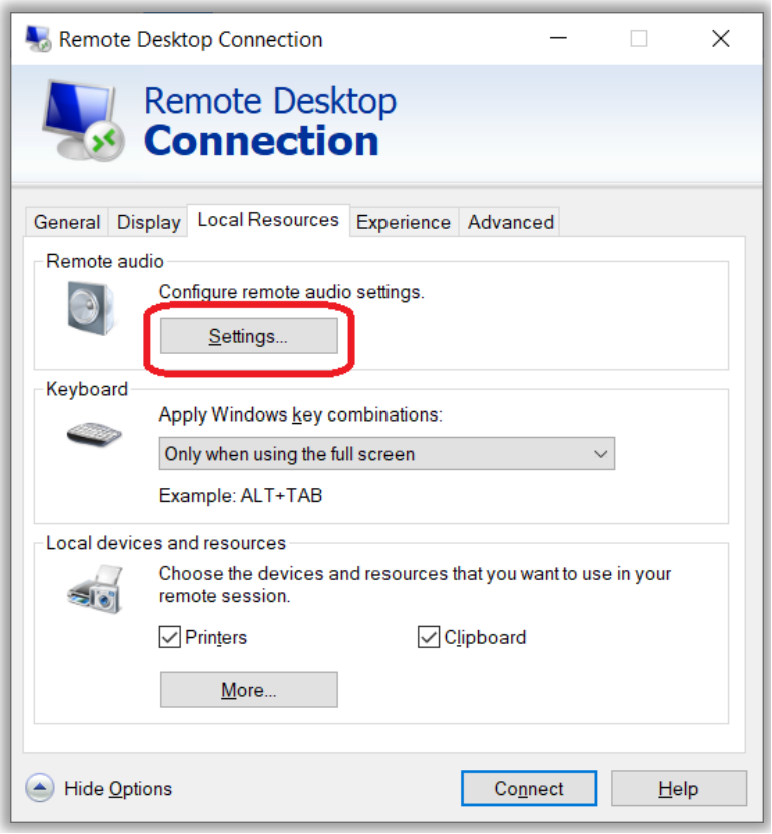
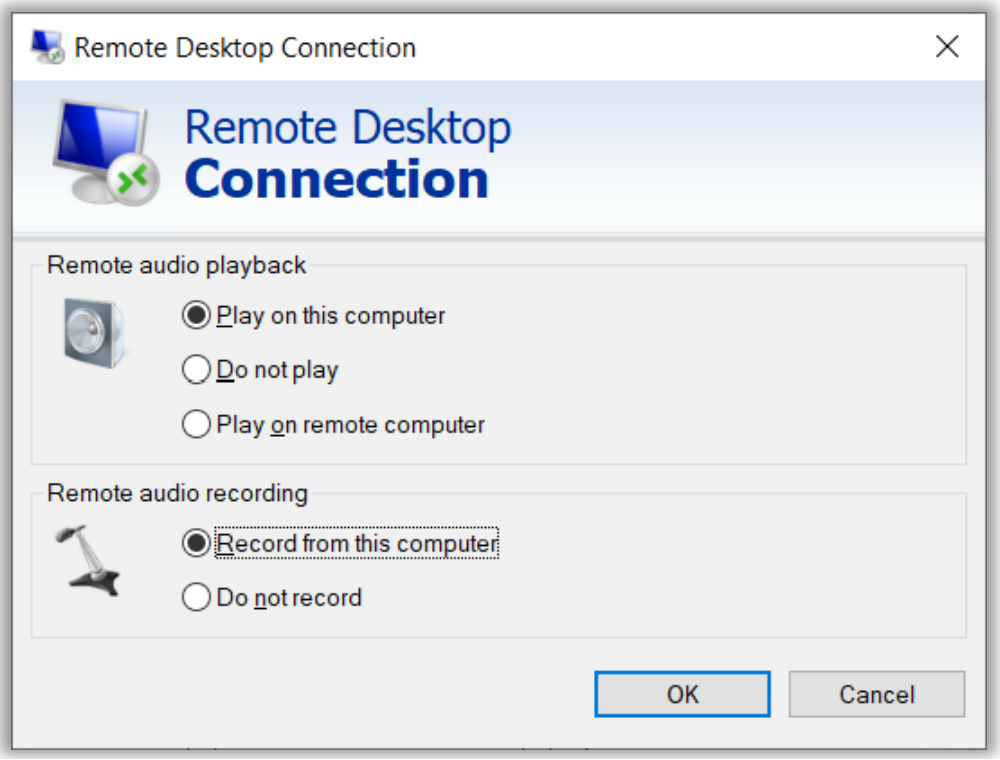
9. Select “Play on this computer” (for remote audio to play on local machine) and “Record from this computer” (for local mic to be used on remote machine) and then select” OK.” Note that the audio and the microphone must first be configured correctly on the local machine to use them
10. Remote Video Configuration
Click on “Show Options”

11. From there, select the “Local Resources” tab and then the “More…” button under “Local devices and resources.”
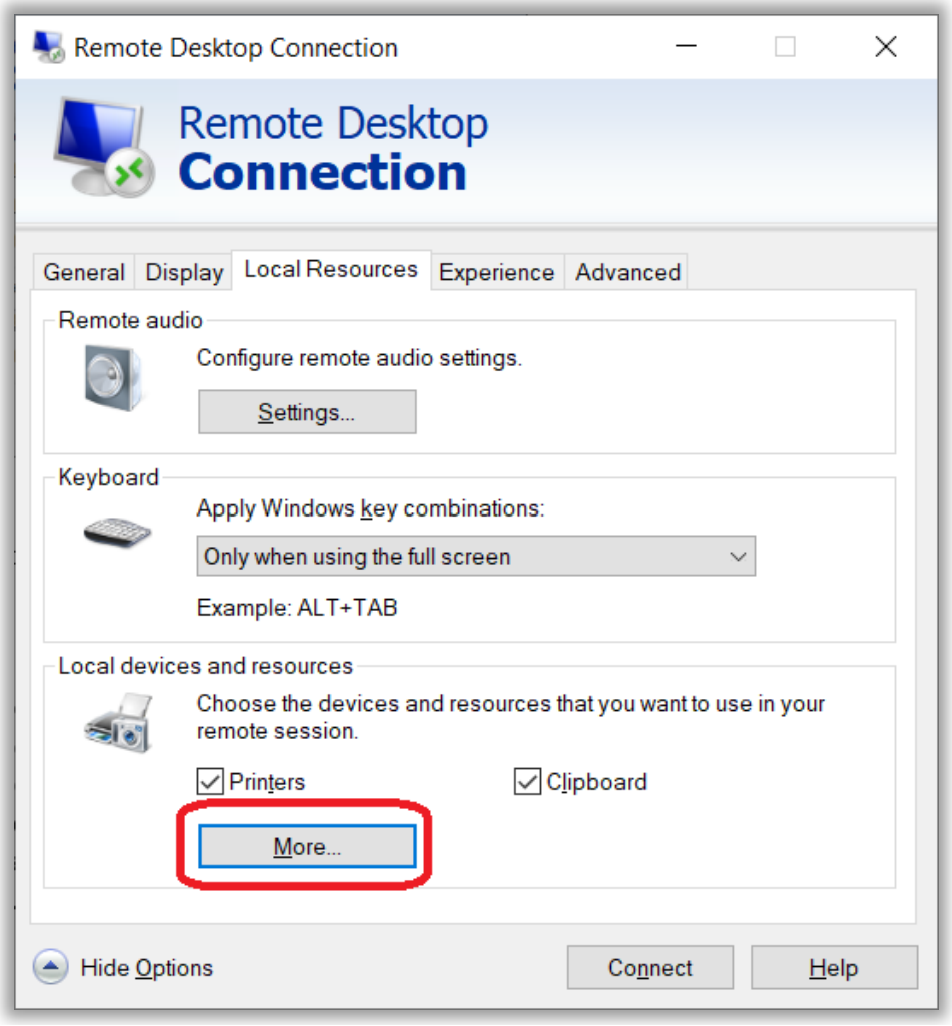
12. From the next screen, check the box next to “Video capture devices” and select “OK.”

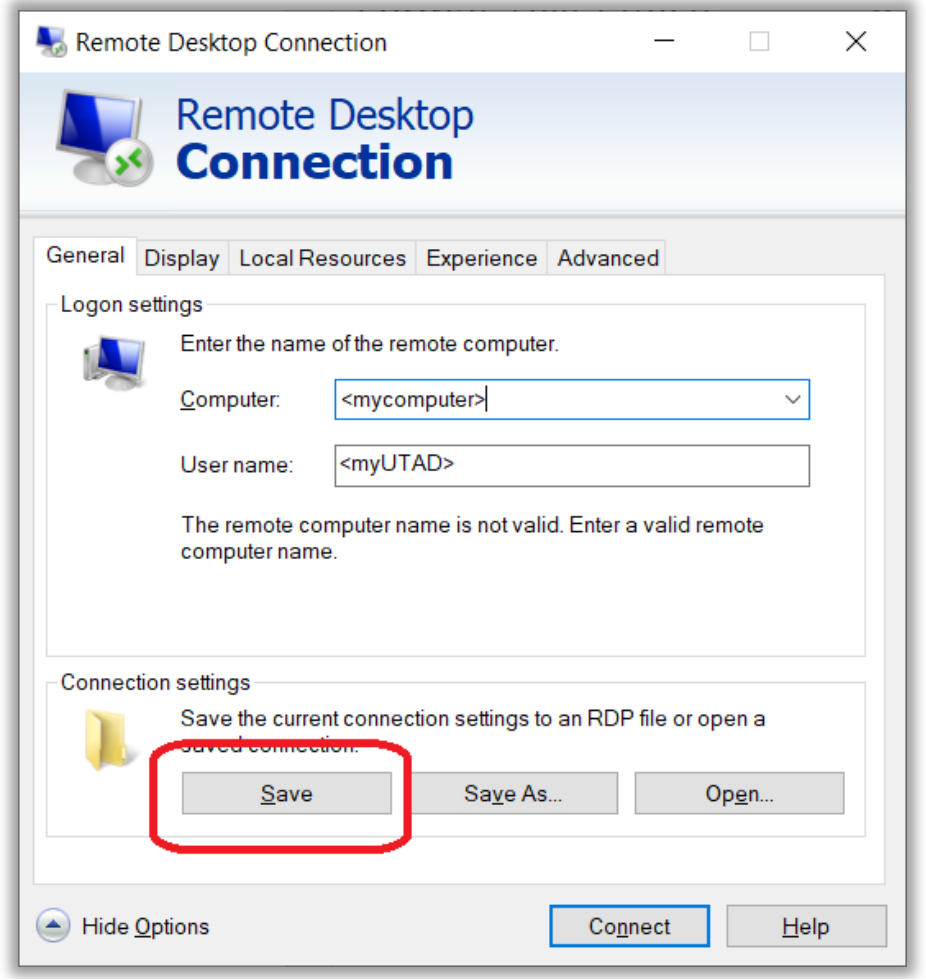
With this, you should be all set 😊. Note: If you wish to save the settings from either of the previous two steps, return to the “General” tab and select the “Save” button. Alternatively, you can save/restore multiple configuration settings with the “Save As…” and “Open…” buttons/options.
Please call the IT Help Desk at 419-530-2400 (Main campus) or 419-383-2400 (Health Science campus) if you still need any additional assistance. You can also submit a ticket by going here and please make sure to include any screenshots of the error you get while doing this process. If you are unable to submit us a ticket, send us an email at ithelpdesk@utoledo.edu


