Appointments & Documentation
Enabling appointment scheduling allows students to self-schedule their own appointments through Starfish. To get this feature configured, you will need to go through the initial configuration steps with the Starfish Administrator. If you have any questions, contact AcademicSuccess@utoledo.edu.
Documentation MethodS
Note Documentation
One-way communication to the student. Specifically, when you conduct general outreach
(email message, attempted phone call, etc.) and there is no student response.
Meeting Documentation
Two-way communication with the student. Specifically, when you have a conversation
with the student via phone call, face-to-face, video chat, or email message conversation.
Event Documentation
Two-way communication with a group of students. Specifically, when you have a conversation with a group of students via face-to-face or video chat conversation.
After you meet with a student (either scheduled or walk-in), document your meeting notes within Starfish, so that you can capture all student interaction outcomes in one location. Additionally, this allows other users in Starfish (with specific permissions) to be able to view your meeting notes, so that the student can be holistically supported on campus.
Document a Walk-In Appointment
- Access Starfish Calendar: Click the Starfish menu and then click "Appointments".
- Add Appointment: Click on the Appointment button located at the top of the page.
- Enter Student Information: Search for the student you would like to document an appointment. If unable to locate
the student, manually create a temporary student account using the prospective student
feature.
- Enter Date and Time of Appointment: Enter a date and time that occurred in the past. Students will only receive email
notifications for appointments that are scheduled for a future date and time.
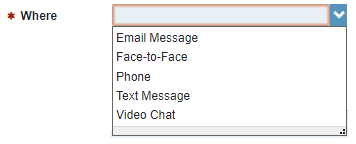
- Select Location: The drop-down menu will provide a list of appointment locations you have designated
in your Starfish profile. Please note that the locations of "email message" and "text
message" should only be used for back-documentation purposes.
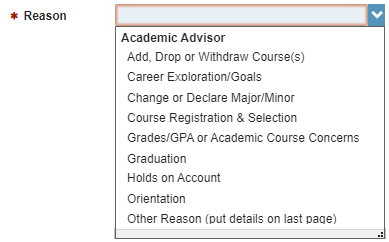
- Select Reason: The drop-down menu will provide a list of appointment reasons associated with your
role.
- Select a Course (Not Required): If the appointment is regarding a specific course, select the course option, which
will list the courses the student in currently enrolled.

- Set Sharing Permissions: It is highly recommended to leave the appointment marked as "Shared", which will allow
other colleagues to be able to view the appointment listed under the permissions section.
If you select "Private", the appointment can only be viewed by you, your calendar
managers, and the Starfish administrators.

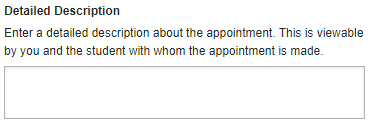
- Enter Detailed Description (Not Required): This feature is only relevant for appointments scheduled in the future, so do not
enter appointment notes here, unless you would like the student to see the notes as
well.
- Outcomes Tab: Click the Outcomes tab.

- Enter Comments: Document a summary of the interaction you had with the student during your meeting.
If you are documenting an email message interaction, you may copy the email thread
and paste it into the comment box.
- Send Copy to Student (Not Required): The notes entered under the outcomes tab in the Comments box are not viewable by the
student. However, if you would like the student to receive a copy of your documented
notes, you may select the option "Send a copy of note to student", which will send
them a copy of your documented notes.
- SpeedNotes Tab: Click the SpeedNotes tab.

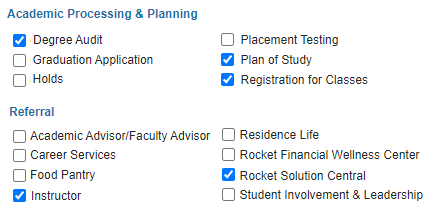
- Select SpeedNotes: Quickly document your meeting outcomes by selecting SpeedNotes, which are topics
commonly talked about during an appointment.
- Click Submit to save changes.
Document a Pre-Scheduled Appointment
- Access Starfish Calendar: Click the Starfish menu and then click "Appointments".
- Locate Appointment: Click the Week View. Use the calendar navigation to locate the appointment you would like to add documentation.
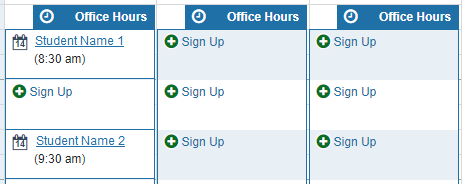
- Click Outcomes: Hover over the calendar icon next to the student's name. Click Outcomes.
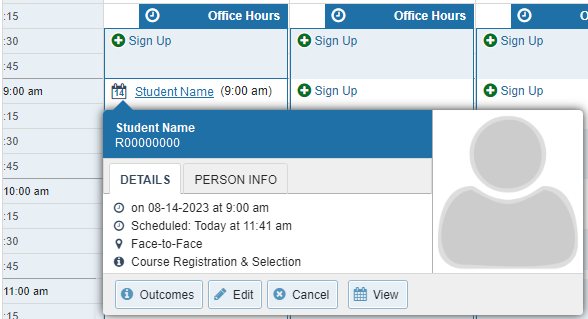
- Outcomes Tab: The appointment's outcomes tab will open.

- Enter Actual Time (Not Required): Enter the actual start and end time of the appointment. This is an opportunity to
document the actual duration of the appointment in case it is different than what
was original scheduled.
- Attendance: If the student did not show up for their scheduled appointment, select the box "Student
missed appointment". This will mark the student as a no show and send them a communication
about their missed appointment.
- Enter Comments: Document a summary of the interaction you had with the student during your meeting.
If you are documenting an email message interaction, you may copy the email thread
and paste it into the comment box.
- Send Copy to Student (Not Required): The notes entered under the outcomes tab in the Comments box are not viewable by the
student. However, if you would like the student to receive a copy of your documented
notes, you may select the option "Send a copy of note to student", which will send
them a copy of your documented notes.
- SpeedNotes Tab: Click the SpeedNotes tab.

- Select SpeedNotes: Quickly document your meeting outcomes by selecting SpeedNotes, which are topics
commonly talked about during an appointment.

- Click Submit to save changes.
Edit Appointment
- Access Starfish Calendar: Click the Starfish menu and then click "Appointments".
- Locate Appointment: Click the Week View. Use the calendar navigation to locate the appointment you would like to edit.

- Edit Appointment: Hover over the calendar icon next to the student's name. Click edit and make your
desired adjustments to the appointment.

- Click Submit to save changes.
If you have office hours configured in Starfish, students will mostly be self-scheduling their own appointments on your calendar. However, if you need to make changes to the appointment or need to add an appointment outside of your office hour block, follow the steps below.
Create Appointment
- Access Starfish Calendar: Click the Starfish menu and then click "Appointments".
- Add Appointment: Click on the Appointment button located at the top of the page. Alternatively, you
can click on the week view tab to access your office hour blocks and then click the
Sign-Up button for the date and time of the appointment.
- Enter Student Information: Search for the student you would like to schedule an appointment. If unable to locate
the student, manually create a temporary student account using the prospective student
feature.
- Enter Date and Time of Appointment: Enter a minimum time interval of 15 minutes for your appointment. If you are documenting
an appointment that already occurred, enter a date and time that occurred in the past.
Students will only receive email notifications for appointments that are scheduled
for a future date and time.
- Select Location: The drop-down menu will provide a list of appointment locations you have designated
in your Starfish profile. Please note that the locations of "email message" and "text
message" should only be used for back-documentation purposes.

- Select Reason: The drop-down menu will provide a list of appointment reasons associated with your
role.

- Select a Course (Not Required): If the appointment is regarding a specific course, select the course option, which
will list the courses the student in currently enrolled.

- Set Sharing Permissions: It is highly recommended to leave the appointment marked as "Shared", which will allow
other colleagues to be able to view the appointment listed under the permissions section.
If you select "Private", the appointment can only be viewed by you, your calendar
managers, and the Starfish administrators.

- Enter Detailed Description (Not Required): Enter further details regarding the appointment topic to serve as a reminder of things
to review with the student once the appointment occurs. The student can view the notes
entered here and will be sent these notes in the confirmation email, so use it as
an opportunity to communicate anything the student may need to prepare prior to the
meeting.

- Click Submit to save changes.
Cancel Appointment
- Access Starfish Calendar: Click the Starfish menu and then click "Appointments".
- Locate Appointment: Click the Week View. Use the calendar navigation to locate the appointment you would like to cancel.

- Cancel Appointment: Hover over the calendar icon next to the student's name. Click cancel.

- Message to Student: If you would like to include a message to the student, enter the details in the message
section. If not, leave that section blank.

- Click Submit to save changes.
Edit Appointment
- Access Starfish Calendar: Click the Starfish menu and then click "Appointments".
- Locate Appointment: Click the Week View. Use the calendar navigation to locate the appointment you would like to edit.

- Edit Appointment: Hover over the calendar icon next to the student's name. Click edit and make your
desired adjustments to the appointment.

- Click Submit to save changes.
Encourage students to utilize the appointment scheduling feature through a myriad of methods, so they are more likely to utilize this feature and make appointments with you. View the various methods below.
Direct Scheduling Link
- Access Starfish Profile: Click the Starfish menu.
- Edit Profile: Click on the arrow next to your name, then click "Edit Profile".
- Profile Settings: Under the section called “Profile Settings”, locate your link called “Link to schedule
an appointment with me”.
- Copy Link: Click "Copy URL to Clipboard" to copy your link and send to students.
Jump Back to Top of Section
Add Link to Email Signature
- Open Outlook: Access Outlook via the web browser or your desktop application.
Access Outlook - Create New Email Message: Open your Outlook email and create a new email message.
- Access Signatures: Under the heading called “Insert”, locate the button that says “Signature” and then
click on the last option “Signatures…”
- Create Signature: In the new window, click on “New Signature” and create a name for this new signature
such as "Official UToledo Signature".
- University Template: In a new browser tab, access the university signature template creator in order to
create the base of your email signature with the university branding.
Email Signature Template - Edit Signature: Back in Outlook, paste the university branded signature in the editing box.
- Add Schedule Appointment Phrase: Add an additional line to your signature that says “Schedule an Appointment with
Me”.
- Obtain Starfish Appointment Link: In a new browser tab, access your Starfish profile to obtain your appointment scheduling
link and copy it to your clipboard.
Access Direct Scheduling Link - Insert Starfish Scheduling link: Back in Outlook and in the editing box, highlight the phrase “Schedule an Appointment
with Me” and click on the hyper link icon. Paste your appointment scheduling link
into the Web Address section and click "OK".
- Adjust the Default Signature Options: Once you have your signature created, select the default signature options for when
you would want the signature to be added to your email messages. The suggestion is
to have your signature display for any new messages and any replies/forwards, so select
the name of your new signature such as "Official UToledo Signature" from the drop-down
menu options.
- Click OK or SAVE to have your signature changes saved.
Jump Back to Top of Section
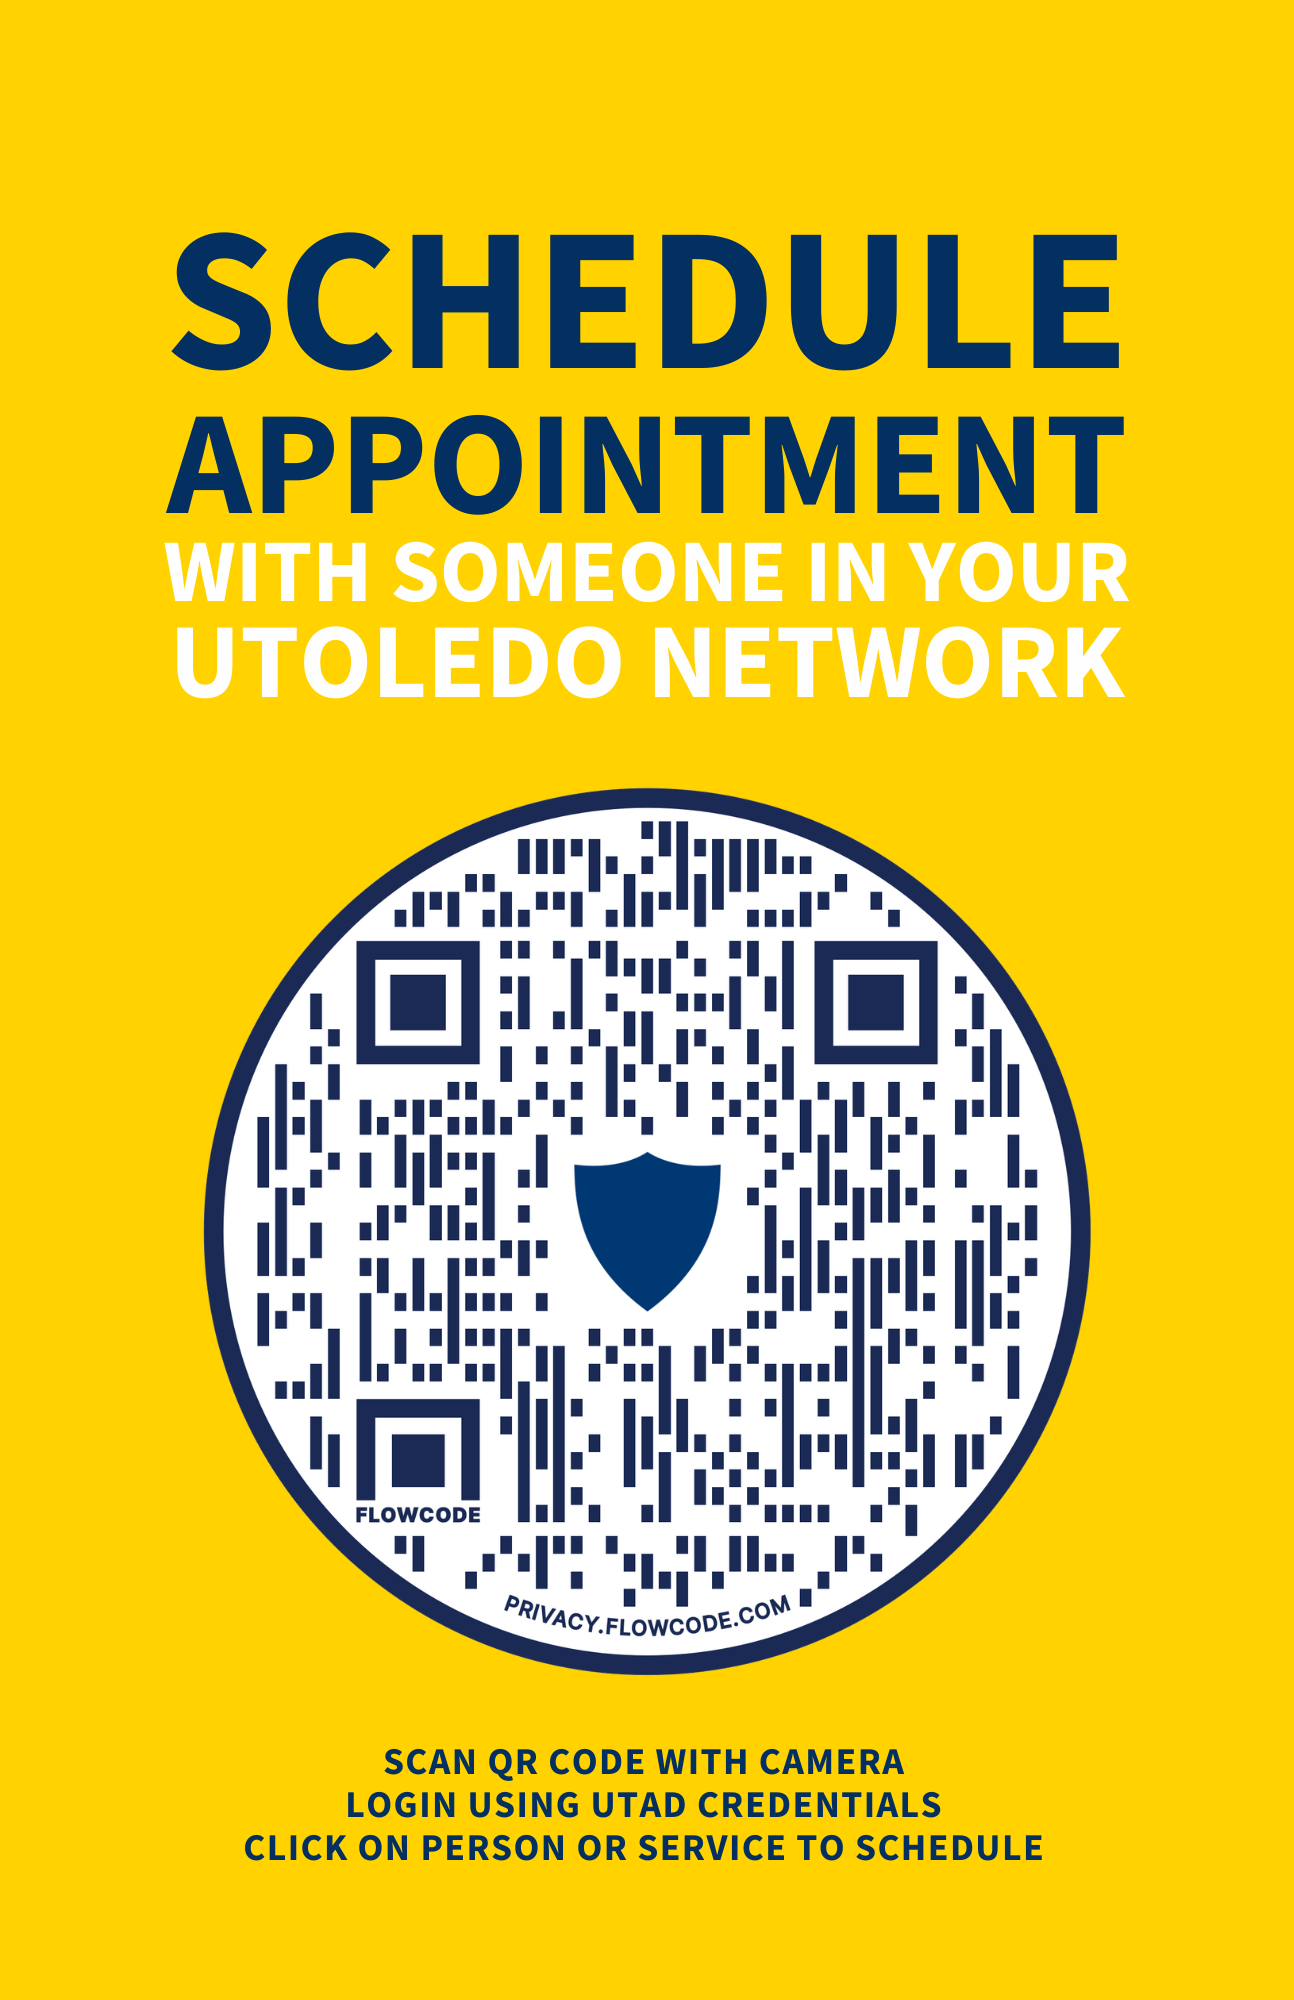
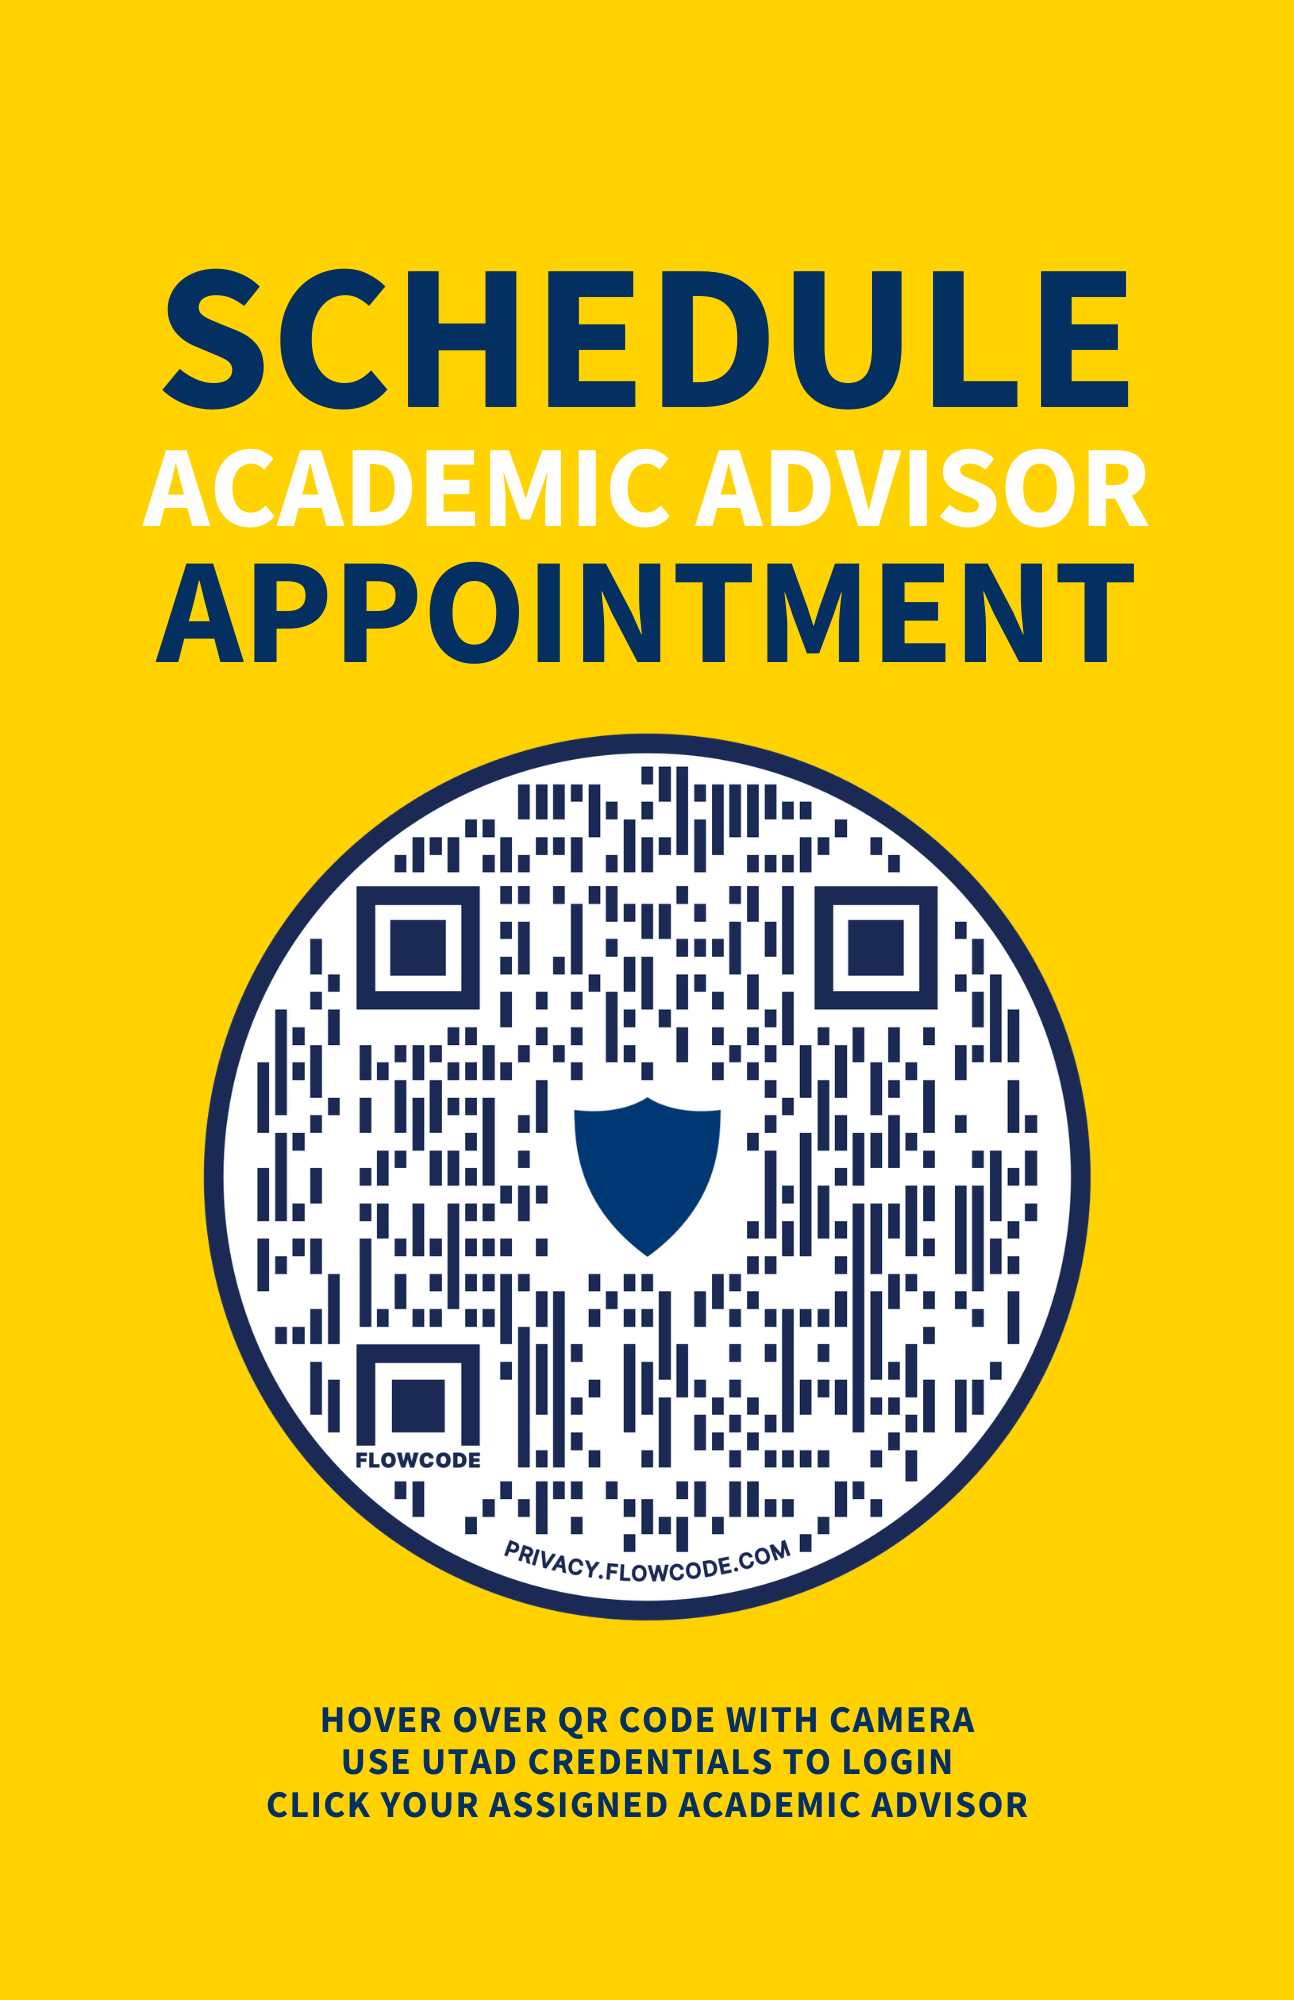
QR Code Poster for Students to Scan
Students can schedule appointments by scanning a QR code, click image below to access a printable document.
If you encounter a student not in the platform, please notify AcademicSuccess@utoledo.edu.
In the meantime, use the prospective student feature in Starfish to create a temporary
student folder. This will allow users to schedule appointments and add documentation
on students not in Starfish. Once the student's real folder imports into Starfish,
it will merge with the temporary folder created.
How to Create a Prospective Student Folder
Every semester, you will need to create new office hour blocks, so students can continue to self-schedule appointments with you. If you work a hybrid schedule or need to allocate a day for walk-ins, the directions will provide you guidance on how to proceed with setting up this type of schedule.
First-Time for Enabling Appointment Scheduling?
In order to enable Starfish appointment scheduling for the first time, it is important
to meet with the Starfish Administrator to officially set up your profile and enable
all necessary configurations.
Create Office Hours
- Access Starfish Calendar: Click the Starfish menu and then click "Appointments".
- Add Office Hour Block: Click the Office Hour button. If you are working a hybrid schedule, you will need
to create two sets of office hours with different location options. The first set
will be for the days you are working in-person and the second set will be for the
days you are working remote.
- Title: Enter your name followed by "Office Hours".

- What Days: Select Weekly and repeats every 1 Week. Select the days you would like to offer the
ability for students to self-schedule appointments. If you plan to offer a day for walk-in appointments, do not select that day from the
list. If you are working a hybrid schedule and creating two sets of office hours,
only select the associated days that you plan to set up for this location type (in-person
or remote). When creating the next set of office hours, select the remaining days.

- What Time: Type the time frame you will be available for students. Note that the selected end
time means that your latest appointment slot would finish at 5:00pm, not start at
5:00pm.

- Where: Select the location options you want to make available for students (Face-to-Face,
Video Chat, Phone). Do NOT select email or text because this will allow students to
schedule an email or text appointment, which is not a common practice. If you are
working a hybrid schedule and creating two sets of office hours, only select the associated
locations that you plan to set up for these days.

- Location Instructions: Review the instructions for each location type to ensure they are up to date. Changes
can be made in your Starfish profile. Click on the Starfish Menu >> Click your Name
>> Click Appointment Preferences.
- Office Hour Type: Select "Scheduled and Walk-ins". Even though we are adding office hours for scheduled
appointments only, it is important to still select this option to not interfere with
the back documentation feature.

- How Long: The minimum length will be the default time interval for appointments, but the student
will have the option to select a longer duration based on the set maximum length.
If you would like to add a buffer in between appointments, add an additional 10 -
15 minutes to your set minimum length (Example: you desire a 30-minute appointment,
but a 15-minute buffer between appointments, so instead set your minimum to 45 minutes).

- Appointment Type: Depending on your role, you may have multiple options available for the appointment
types. Select the associated meeting types you would like to offer during this office
hour block.
- Instructions: View suggested instructions below. You may personalize your office hour instructions
as you need, which are viewed by students when scheduling an appointment.

- "Please provide your phone number in the description box. If you respond to any of
the appointment reminder emails, you will NOT receive a response. Instead, you may
directly email me (INSERT YOUR EMAIL ADDRESS) with any questions. If you plan to have
a guest attend the appointment, fill out a FERPA release form and email me the completed
form. https://www.utoledo.edu/offices/registrar/pdfs/FERPAconsent.pdf "
- Start/End Date: View suggested dates below. For start date, enter the next day after your current
office hours end. For end date, do not select "End of Term", instead select "on date"
to specify a date. Entering office hour blocks in semester-based increments puts a
limit on how far in advance students can schedule an appointment, which allows you
the ability to review and update your Outlook calendar availability for the following
semester. However, if you do not anticipate your office hours to change as frequently
and prefer to schedule your office hour blocks in year-based increments, feel free
to adjust the end date setting accordingly.

-
- Fall Semester: Start Date is August 1 and End Date is December 31.
- Spring Semester: Start Date is January 1 and End Date is May 31.
- Summer Semester: Start Date is June 1 and End Date is July 31.
- Click Submit to save your new set of office hours. Check to make sure your new office hours are
appearing correctly by reviewing them on the day you entered as your start date.
- Add More Office Hours, if Needed: If you are working a hybrid schedule, you will need to add another set of office hours
for the days you are working remotely. To do so, repeat steps 2 through 13.
- Review Outlook Calendar: Ensure to block off time when you are busy and not available to meet with students
throughout the next semester. Some considerations include University holidays & breaks,
lunch hour, scheduled class time, vacation or sick time, etc. The Starfish calendar
will only import the busy times listed on your Outlook calendar and only read up to
12 weeks' worth of your Outlook calendar at a time.
Jump Back to Top of Section
Cancel Office Hours
- Access Starfish Calendar: Click the Starfish menu and then click "Appointments".
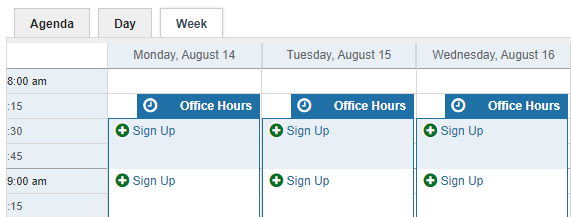
- Locate Office Hour Block: Click the Week View. Use the calendar navigation to locate the office hours you would like to cancel, which is the calendar block featuring sign up buttons.
- Review for Appointments: Identify if there are any pre-existing scheduled appointments occurring in the future.
If you would like to cancel all future appointments, continue to next step. If you
would like to keep the appointments, write down the appointment details because once
we cancel office hours, it will delete all pre-existing appointments.

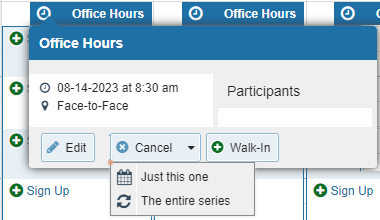
- Cancel Office Hour Block: Hover over the clock icon on the blue heading labeled "Office Hours". Click cancel,
which will give you two additional options, either "just this one" or "the entire
series". Selecting "just this one" will only cancel the office hour block occurring
on that specific day. Selecting "the entire series" will cancel all future office
hours.
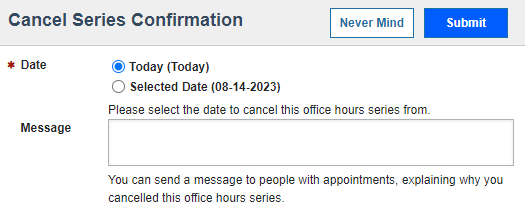
- Cancel Series Confirmation: If given the option, select the date you would like to be the start of you canceling
the office hours, either Today or the Select Date.
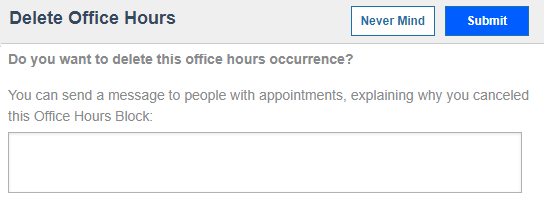
- Message to Students: If you would like to include a message to students who have pre-existing appointments
that will be canceled, enter the details in the message section. If not, leave that
section blank.
- Click Submit to save changes.
- Add Previously Schedule Appointments: If you wrote down any appointments from step 3, which you would like to add back
onto your calendar, recreate those appointments.
Jump Back to Top of Section
Edit Office Hours
- Access Starfish Calendar: Click the Starfish menu and then click "Appointments".
- Locate Office Hour Block: Click the Week View. Use the calendar navigation to locate the office hours you would like to edit, which is the calendar block featuring sign up buttons.

- Edit Office Hour Block: Hover over the clock icon on the blue heading labeled "Office Hours" and click edit.
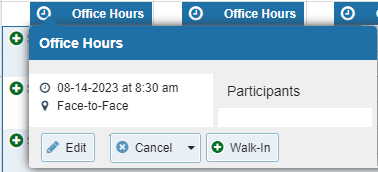
- Make Adjustments: Any changes made (appointment duration, available locations, etc.) will affect all
subsequent days of office hours. Therefore, if you need to make an adjustment to just
one day of office hours, visit the section below labeled "Adjust Office Hours for
a Remote Day".
- Click Submit to save changes.
Jump Back to Top of Section
Adjust Office Hours for a Remote Day
- Access Starfish Calendar: Click the Starfish menu and then click "Appointments".
- Cancel Office Hour Block: Follow the steps under the section above called "Cancel Office Hours" to cancel office
hours just for a specific date, do not cancel the entire series.
- Add Office Hour Block: Follow the steps under the section above called "Create New Office Hours" to create
new office hours for this specific date. For the start and end date, you would only
want to enter the date of the day you just canceled office hours.
Jump Back to Top of Section


