ePAF Originator
Originator-An Employee who creates/initiates the EPAF
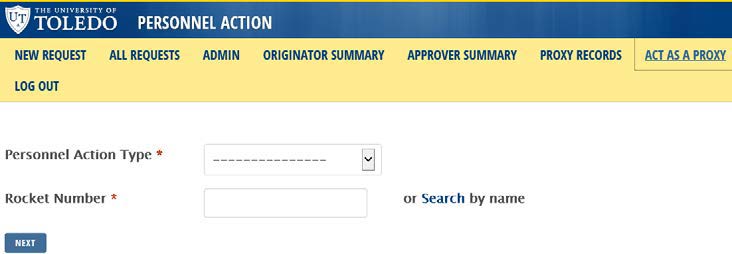
Requesting Access
- Form Link
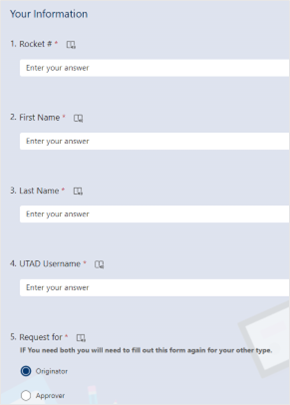
- Enter your information:
- Rocket #
- First Name
- Last Name
- UTAD Username
- Request (1 request for each of type of access)
- Originator
- Approver
- Click Next
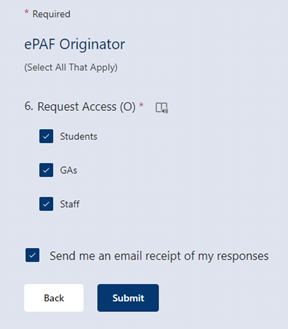
- What access do you need?
- Student
- GA’s
- Staff
- Do you want an email receipt of your responses? If yes, then check the box
- Click Submit
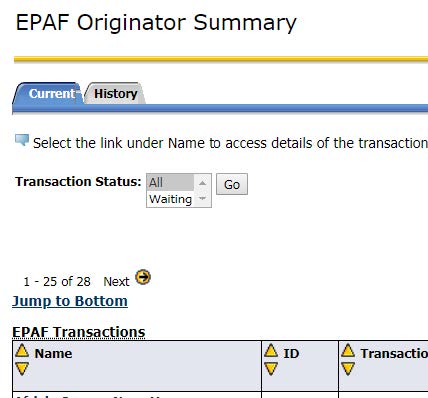
Entering an ePAF Summary
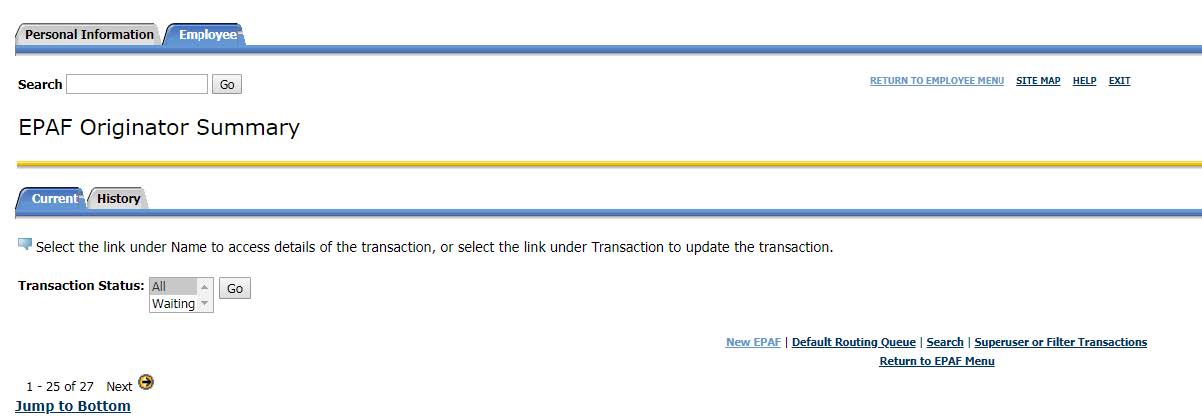
- Access ePAF Originator Summary at https://bannerepaf.utoledo.edu/
2. Current – ePAFs in the Current tab are waiting on an action from you
-
- ePAFs here will have one of the following Transaction Statuses:
- Waiting- ePAF has been created and saved, but not submitted
- Return for Correction- ePAF has been returned to you for correction
- ePAFs here will have one of the following Transaction Statuses:
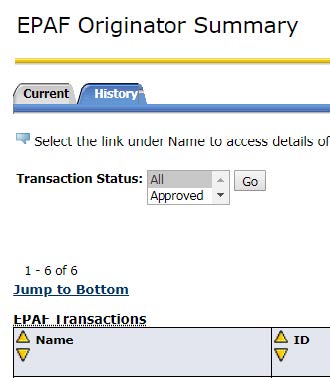
3. History – ePAFs in the History tab have been submitted
-
- ePAFs here will have one of the following Transaction Statuses:
- Approved- ePAF has been approved at all levels and is awaiting the final step which is an automated night run to apply it to Banner
- Pending- ePAF is waiting for approval
- Completed- ePAF has been applied to Banner
- ePAFs here will have one of the following Transaction Statuses:
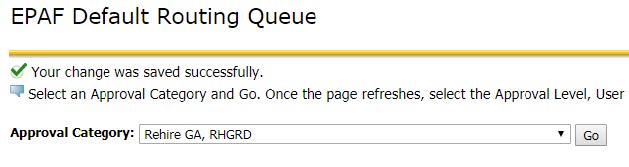
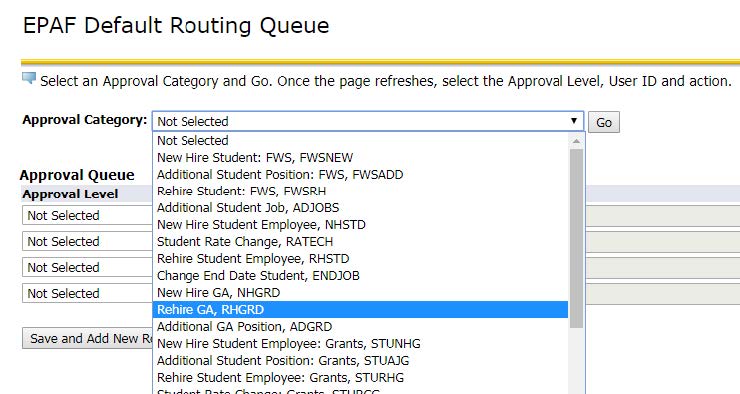
Setting Up a Default Routing Queue
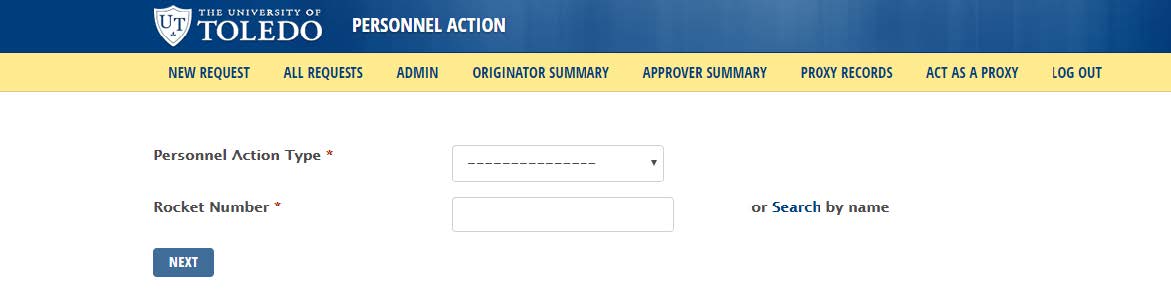
- Select Originator Summary on Personnel Action screen
2. Select Default Routing Queue
3. Select Approval Category you want to set up a default routing queue for and click on Go
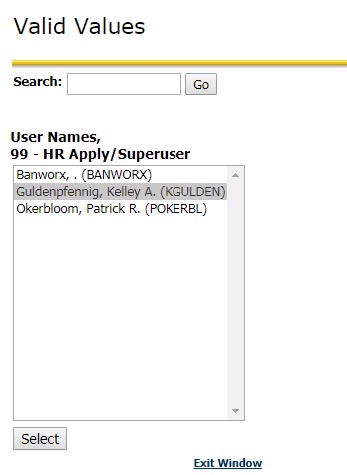
4. Click on magnifying glass icon to search for a User Name
L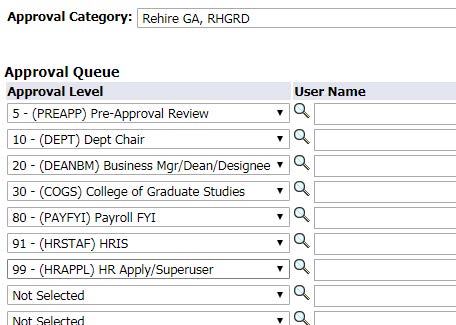
5. Click on the User Name of the individual that should approve your ePAF at that level the click Select
6. Once you have a User Name filled in all levels, click Save and Add New Rows
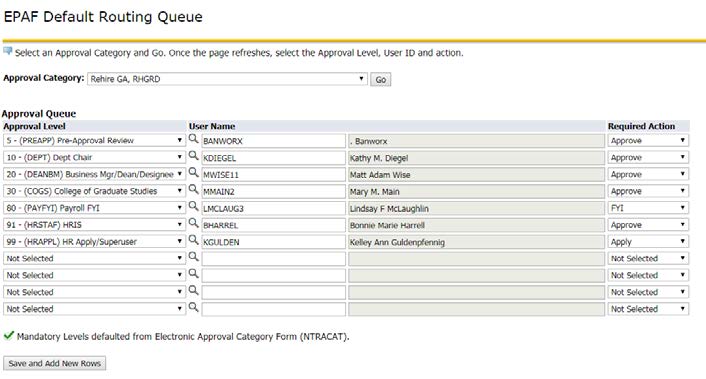
Congratulations, you have successfully set up default routning queues!
Make sure you perform these steps for every approval catagory you have!